Obtaining a Philippine passport is a crucial step for anyone planning to travel abroad, whether for leisure, work, or education. In this guide, we’ll walk you through the process of booking a passport appointment in the Philippines, including tips, requirements, and essential information to ensure a smooth experience.
Why You Need a Passport Appointment
The Department of Foreign Affairs (DFA) requires all applicants to secure an online appointment for passport applications. This system minimizes crowding, improves service efficiency, and ensures orderly processing at DFA offices nationwide. Booking a passport appointment is mandatory whether you are applying for a new passport or renewing an expired one.
How to Book Passport Appointment in the Philippines – Step-by-Step Guide
1. Visit the DFA Online Appointment System Website
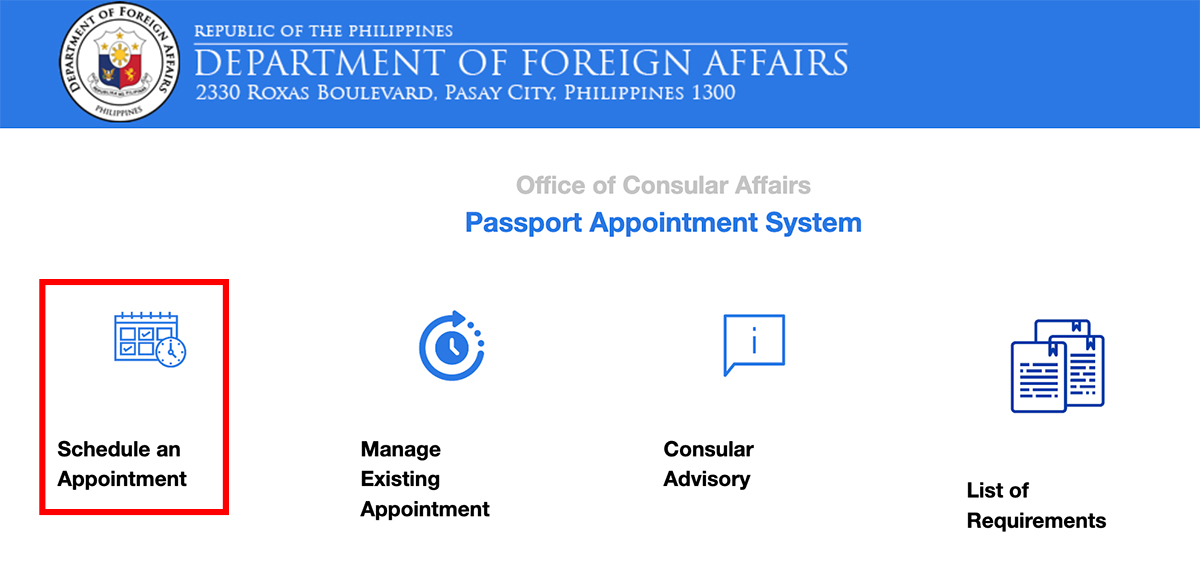
Start by going to the official DFA Online Appointment System (https://passport.gov.ph). This portal allows you to select your preferred date, time, and DFA branch for your passport application. Select schedule an appointment.

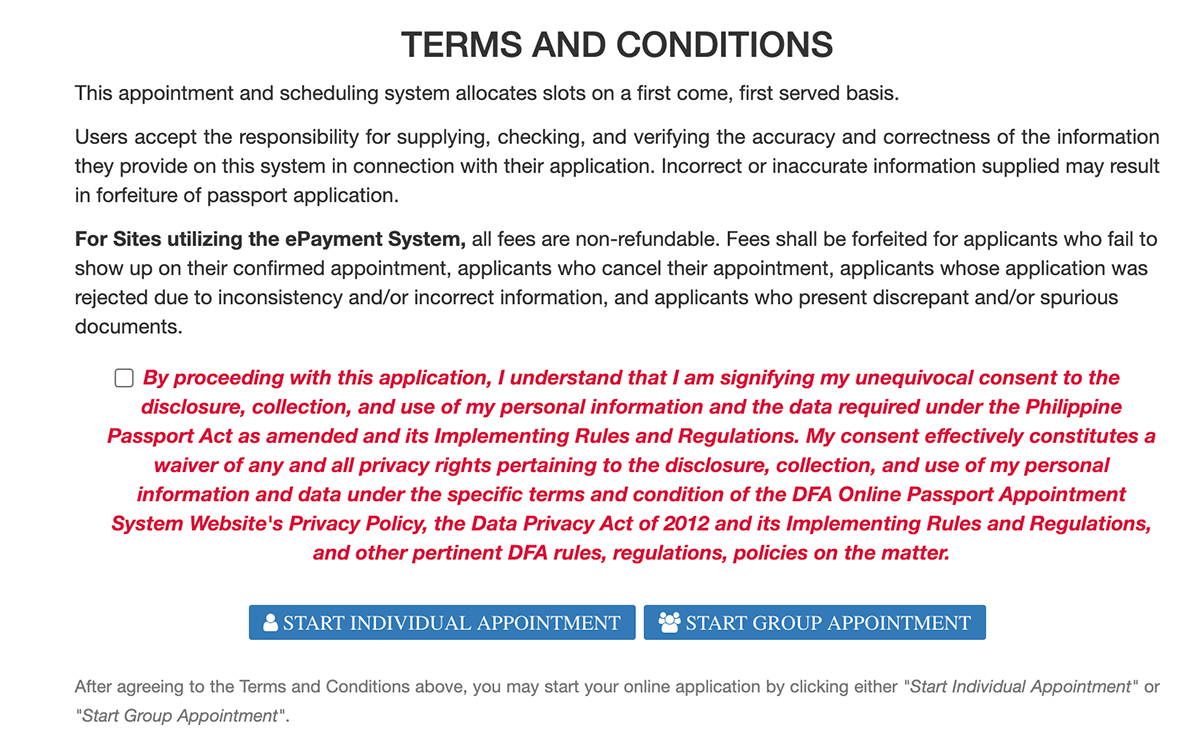
2. Choose Individual or Group Appointment
If you’re applying alone, select the individual appointment option. For families or groups of up to five people, opt for a group appointment. This ensures everyone in the group is accommodated in one schedule.

3. Select Your Preferred DFA Branch
Choose a DFA branch nearest to your location. The system will show available slots for each branch, allowing you to pick the most convenient time and date.
4. Fill Out the Application Form
Provide accurate personal information, including your full name, birthdate, address, and other required details. Double-check your entries to avoid discrepancies that could delay your application.
5. Confirm Your Appointment
After filling out the form, review the information and confirm your appointment. You’ll receive a reference number and a confirmation email with your appointment details. Print the email and bring it on the day of your appointment.
6. Pay the Passport Processing Fee
Payment options include over-the-counter transactions at select payment centers or online payment via credit/debit card. Fees are as follows:
- Regular Processing (12 working days): PHP 950
- Express Processing (6 working days): PHP 1,200 Note that actual processing times may vary depending on the DFA branch and unforeseen circumstances.
7. Prepare Your Documents
Compile all necessary documents for your passport application. Missing documents could result in delays or denial of your application.
Read: How to Pay for DFA Passport Appointment: A Step-by-Step Guide
Requirements for Passport Application in the Philippines
For New Passport Applicants:
- Confirmed Appointment Schedule: Printed email confirmation.
- Duly Accomplished Application Form: Downloadable from the DFA website.
- Original and Photocopy of PSA Birth Certificate: Ensure the certificate is clear and legible.
- Valid ID: Examples include a driver’s license, SSS ID, or student ID.
- Supporting Documents (if applicable): Marriage certificate for married women, affidavit of guardianship for minors, etc.
For Passport Renewal:
- Confirmed Appointment Schedule: Printed email confirmation.
- Current Passport: Bring both the original and a photocopy.
- Valid ID: Examples include a driver’s license, SSS ID, or PRC ID.
- Additional Requirements: If the passport was issued before 2010, bring your PSA birth certificate for verification.
Tips for a Smooth Passport Appointment Experience
1. Book Early
Slots can fill up quickly, especially during peak travel seasons. Plan and book your appointment several weeks or months in advance.
2. Arrive on Time
Arriving at least 30 minutes before your scheduled appointment ensures you have time to complete security checks and locate your designated processing area.
3. Dress Appropriately
Avoid wearing sleeveless tops, revealing clothing, or overly casual attire. DFA staff may require you to reschedule if you’re not dressed appropriately.
4. Bring Exact Change for Payments
For those paying on-site, having exact change can speed up the payment process.
5. Double-Check Your Documents
Verify that all your documents are complete and accurate. Missing or incorrect information could delay your application.
6. Be Patient and Courteous
Processing times can vary depending on the number of applicants. Being polite and patient goes a long way in ensuring a hassle-free experience.
Frequently Asked Questions (FAQs)
1. How soon can I get my passport after the appointment?
Regular processing takes about 12 working days, while express processing takes about 6 working days. Delivery times may vary depending on your location.
2. Can I reschedule my appointment?
Yes, you can reschedule your appointment through the DFA website. However, rescheduling is subject to slot availability.
3. Is walk-in application allowed?
Generally, walk-in applications are not allowed. However, exceptions are made for senior citizens, PWDs, pregnant women, and minors below 7 years old.
4. What should I do if I missed my appointment?
If you missed your appointment, you’ll need to reapply and secure a new schedule. Refunds for the processing fee are not available.
Final Thoughts
Securing a passport appointment in the Philippines doesn’t have to be stressful. By following this comprehensive guide, preparing your documents, and planning ahead, you’ll have a seamless experience. Your Philippine passport is your key to exploring the world, so ensure that the application process is as smooth as possible.
Read Also:
- PhlPost IDs, to be Accepted by the DFA For Passport Applications
- Passport Reminders Everyone Should Know
Disclaimer: This guide is for informational purposes only. While we strive to provide accurate and up-to-date information, policies and requirements may change. Always refer to the official DFA website or contact their office directly for the most reliable and current details

